Wednesday, June 8, 2011

The anatomy of a dress.

I have a strange way of not being able to shut my mind off when it comes to dresses. When I see a dress I like I generally start disecting it and thinking about what the pattern pieces are shaped like and how they are made (I have to admit that this happens in church... often). Sometimes I can't figure it out, but I can usually get pretty close.

A friend recently mentioned she was looking for dresses for a trip she was going on, which inspired me to work on designing one for her. For this one I used the flat pattern method (see "A New Summer Dress" blog for the draping method).
I did some research on her body type and things to avoid and accentuate. She is tall and slender, which made me think I should make something to show off her small waist and widen her at the shoulders and hemline, so that she wouldn't look like a box (not that she could!). On her trip she is going to a warm climate, but lives in an area that is cool more than it is hot, so I thought a summer dress with a jacket to go over it... The dress is strapless but I added loops just inside the front so a ribbon could be added to make it a halter.
It is fitted through the bust, waist and hips but it flairs just below the full part of the hips, again to accentuate the petite waist. The skirt style is called 6-gore with some flair added.

I knew for the jacket I wanted a tailored look with some gathers so that it didn't look too "nun-ish". I wanted the collar wide, but not hideously so. I lowered the neckline by 2 inches all around and added a 2.5 inch wide pleated collar. This reaches to the shoulders and creates width there... I made the sleaves slightly gathered at the top and 3/4 length with a pleated gathered ruffle to fall just below the elbow. I also added 2.5 inches to the natural waist and made pleated gathers there. There is only one button on the jacket, a large covered one just at the waist to pull it in.

I'm mailing it out today and can't wait to see how it fits her!

Sunday, May 8, 2011

Fingerless Mittens


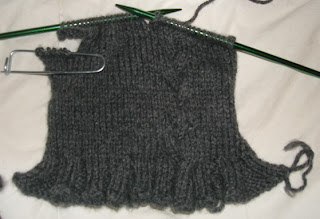
Something I have had a great time developing and making several pairs of, is fingerless mittens. I found a basic pattern, then found patterns for ruffles, cables and "thumbs". I put them all together and came up with the these mittens. Below are pictures of them and if you are a knitter and you're interested I would be more than happy to pass on the pattern to you!

Saturday, April 2, 2011

Souffle!


So one of my favorite desserts to make (and eat!) is chocolate souffles... I first had this dish at a French restaurant in Bigfork Montana called La Provence (www.bigforklaprovence.com) - oh, so good!!!! I decided to try my hand at them and found they aren't as hard as they would seem. After making them a few times I've gotten into a system and they go pretty quickly, plus with the recipe I found (thank you allrecipes.com!) I can make them before dinner, put them in the fridge and just bake them after dinner. They come out just the perfect amount of time later to let your food settle before having desert.

As mentioned above, I found this recipe on allrecipes.com and I'm going to copy and paste it in here, but insert my own photos...

Individual Chocolate Souffles

Submitted By: Ghirardelli®
Prep Time: 10 Minutes
Cook Time: 20 Minutes
Ready In: 30 Minutes
Servings: 2
"These chocolate souffles are perfect for a dinner party as they can be prepared ahead of time and are served in individual ramekins. "

INGREDIENTS:
1 tablespoon unsalted butter, melted
2 tablespoons granulated sugar, plus
2 teaspoons granulated sugar
2 ounces Ghirardelli 60% Bittersweet Chocolate Baking Bar
2 tablespoons milk, plus
2 teaspoons milk
1 egg yolk
2 egg whites
Powdered sugar for dusting

DIRECTIONS:
1. Heat oven to 350 degrees F. Brush two 1 1/2-cup or four 1/2-cup ovenproof ramekins with butter; dust bottom and sides with 1 tablespoon granulated sugar.
In double boiler over hot water, melt chocolate with milk and 1 tablespoon sugar. Cool for 5 minutes.
Whisk egg yolk into chocolate mixture. In large bowl with electric mixer, beat egg whites until soft peaks form; add remaining 2 teaspoons granulated sugar and beat until stiff but not dry.


2. With rubber spatula, fold one-fourth of egg whites into chocolate mixture,
then fold in remaining egg whites. Divide between prepared ramekins. (Souffles may be prepared ahead up to this point and refrigerated for up to 2 hours. Bake straight from refrigerator, adding 3 minutes to baking time.) Bake 20 minutes for large ramekins and 15 minutes for small ramekins. Remove from oven; dust tops of souffles with powdered sugar.


My husband and I like to use a spoon and pull back a little section of the top and add some cream... this is they way they are served at La Provence. Mmmmmmmm! Defintely a dish worth trying!

Tuesday, March 22, 2011

Charlotte's 1st Birthday


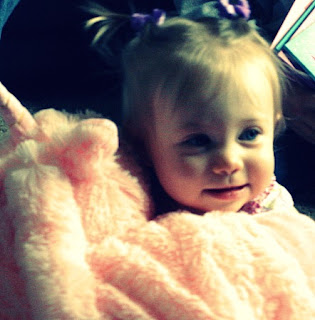
So time really does fly when you have kids - Charlotte is now one year old! Seems like we just brought her home from the hospital. On Saturday we had a birthday party for her with family that came from out of town. We all had fun - especially the birthday girl!


The theme was hard to come up with... she LOVES Curious George, but I couldn't figure out how to girly that up. Fortunately she also loves her Potato Heads, so we went with a Mrs. Potato Head theme. We had the party at lunch time and had a baked potato bar,
we had a Potato Head Photo booth with props,
and My mom made some great cakes which we all devoured!


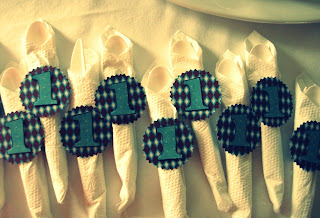
I had a budget for this party, and since I have a ton of crafty stuff, I only ended up spending about $20 on the day (other than the food). I bought some tissue paper and pipe cleaners for flowers and made a "Happy Birthday" banner out of scrapbook paper. Since decorations for Mrs. Potato Head are hard I just did springy things. I used a flower wreath I had on the front door, cut pieces of scrapbook paper for a message board and made napkin rings out of more scrapbook paper. It wasn't extravagant, but I had fun making stuff.


The day was a great success - fun had by all!

Friday, March 4, 2011

A new summer dress!


So since moving I've been thinking and longing for the summer time. I hear it's warmer here for longer and I'm SO excited! Of course this line of thinking led me to clothes, and I began thinking of making a new summer dress. I literally have several totes full of fabric just waiting to be used - so I dug through and found a table cloth that had been given to me, but didn't fit any table I had. It was an antique with a fun floral pattern.
So, I did as follows:

I had a general idea of my design - I wanted it fitted on top with straps and gathered at a high waist. I wanted it about knee length with a gathered hem.
1. I held it up to myself to determine how much of it should be the skirt and cut it in two (roughly 3/4 for the skirt and 1/4 for the top).

2. For my top I used the draping method by cutting off the white border and hemming what would be the "neckline", then fitting the bust to the form. In the past I have always used the flat pattern method for designing, which is precise and involves using and moving darts - basically your design is done in pattern pieces first and then cut and sewn. This time I decided to try the draping method, which means you use a dress form and fit, cut and pin it in place, and then sew.

3. I sewed the outer edges of my "skirt" together.

4. I gathered the top of the "skirt" and fit it to the bottom of the "top".

5. Remember the white excess I cut off of the top before hemming it? I used that plus the white off the bottom and gathered it to make the ruffle for the hem.
6. I put in an invisible zipper
7. I used scraps to make straps with little cap sleeve ruffles.
Viola!

A tablecloth dress... I'm so excited to wear this dress when the weather gets a little warmer!

Thursday, February 3, 2011

A new town, a new home and a new hobby!

So our little family just made a big move - we moved from Kalispell, MT to Umatilla, OR so that we could be together, rather than Kagen being gone all week. We are excited about this change and I'm enjoying having a husband 7 days a week!

Somehow amid all the unpacking I found a new little hobby - baking fancy deserts. I had messed around with making chocolate souffles in the past and made them successfully once, but since we've moved I've perfected the souffles, and went on to make Creme Brulee and my latest adventure was Chocolate Eclairs. Those turned out and I'm on to experimenting with them now. Today I made them cupcake size in a muffin pan... they turned out great! I combined recipes from three sources - Desserts (a book published by Igloo Books in London) for the dough, Betty Crocker's Big Red Cookbook (for the cream filling), and an online annonymous comment for the chocolate topping.

For the dough (which is actually called Choux) you will need:
1 c. water
1/2 c. butter
1 c. flour
4 eggs
Preheat oven to 425 degrees and grease 12 muffin cups with butter. Combine water and butter in a sauce pan - heat until butter melts then increase to a boil. Once it boils remove from heat and add flour quickly, beating with a wooden spoon until it forms a ball. Transfer to another bowl and continue to beat to release more heat. Add eggs one at a time beating until smooth after each egg is added.
Drop spoonfulls into the muffin cups - evenly distributing the dough. Bake 15 minutes at 425, then decrease heat to 350 for another 15 minutes.
Cool at least 30 minutes then cut tops off.


For the cream filling you will need:
1/3 c. sugar
2 T. cornstarch
1/8 t. salt
2 c. milk
2 egg yolks, slightly beaten
2 T. butter
2 t. vanilla
Combine sugar, cornstarch and salt in a sauce pan. Slowly stir in milk and turn on heat to medium. Milk will thicken then come to a boil - boil for 1 minute.

Combine at least half of the milk mixture with the yolks in a separate bowl, then add back into the sauce pan with the other half. Heat all of it to a boil for 1 minute. Stir in butter and vanilla. Pour into glass bowl and press plastic wrap on the top to prevent it from filming over.
Refridgerate for at least one hour. Spoon into eclairs.


For the chocolate topping you will need:
6 oz. dk. semisweet or bittersweet chocolate
1/4 c. water
2 T. butter.
Combine chocolate and water in sauce pan.
Heat very slowly until chocolate is melted and liqiud. Add butter - chocolate should have a shine to it. Use a spatula or basting brush to cover tops of eclairs.


Enjoy!